springboot2.0.1.RELEASE版本使用的springcloud的版本为Finchley版本,本文按照使用eureka的注册中心、eureka的网关、eureka的服务来描述。
eureka注册中心
eureka的注册中心(eureka的server端),核心依赖(pom.xml)如下:
<dependencyManagement>
        <dependencies>
            <dependency>
                <groupId>org.springframework.cloud</groupId>
                <artifactId>spring-cloud-dependencies</artifactId>
                <version>Finchley.RELEASE</version>
                <type>pom</type>
                <scope>import</scope>
            </dependency>
        </dependencies>
    </dependencyManagement>

    <dependencies>
        <dependency>
            <groupId>org.springframework.cloud</groupId>
            <artifactId>spring-cloud-starter-netflix-eureka-server</artifactId>
        </dependency>
    </dependencies>
eureka注册中心的配置(application.properties)如下:
# 服务端口
server.port=1111
# 应用名称(serviceID)
spring.application.name=eureka_center
# 注册自身到eureka服务器
eureka.client.registerWithEureka=true
# 表示是否从eureka服务器获取注册信息
eureka.client.fetchRegistry=false
# 注册中心地址,多个逗号隔开
eureka.client.serviceUrl.defaultZone=http://localhost:1111/eureka/
代码比较简单,只需要一个启动类即可,比较关键的是注解@EnableEurekaServer:
package cn.lovecto.euraka;

import org.springframework.boot.WebApplicationType;
import org.springframework.boot.autoconfigure.SpringBootApplication;
import org.springframework.boot.builder.SpringApplicationBuilder;
import org.springframework.cloud.netflix.eureka.server.EnableEurekaServer;

@EnableEurekaServer
@SpringBootApplication
public class Application {

    public static void main(String[] args) {
        new SpringApplicationBuilder(Application.class).web(WebApplicationType.SERVLET).run(args);
    }

}
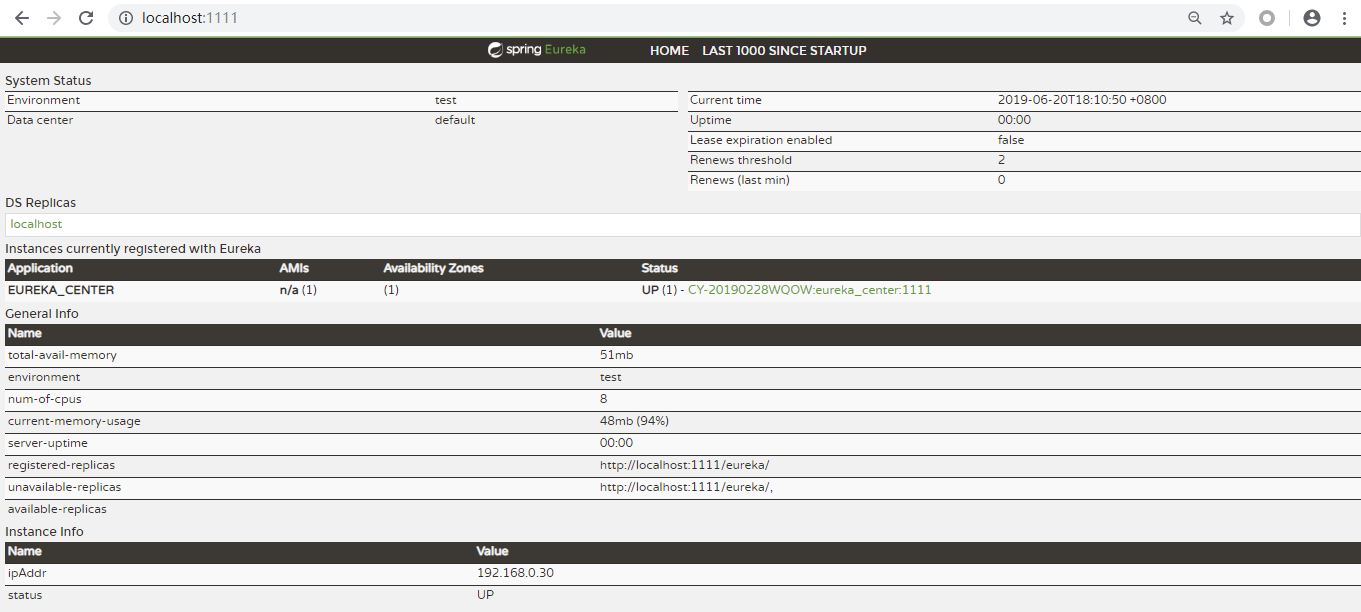
启动后输入“http://localhost:1111”,如下所示:

其中Application中“eureka_center”自己注册成功了。
eureka的服务
eureka的服务在这里是服务提供者的概念,就是真正处理业务请求的,依赖(pom.xml)配置如下:
<dependencyManagement>
    <dependencies>
        <dependency>
            <groupId>org.springframework.cloud</groupId>
            <artifactId>spring-cloud-dependencies</artifactId>
            <version>Finchley.RELEASE</version>
            <type>pom</type>
            <scope>import</scope>
        </dependency>
    </dependencies>
</dependencyManagement>

<dependencies>
    <!--提供springMvc支持 -->
    <dependency>
        <groupId>org.springframework.boot</groupId>
        <artifactId>spring-boot-starter-web</artifactId>
    </dependency>
    <dependency>
        <groupId>org.springframework.boot</groupId>
        <artifactId>spring-boot-starter-test</artifactId>
        <scope>test</scope>
    </dependency>
    <!--eureka -->
    <dependency>
        <groupId>org.springframework.cloud</groupId>
        <artifactId>spring-cloud-starter-netflix-eureka-server</artifactId>
    </dependency>
    <!-- zuul -->
    <dependency>
        <groupId>org.springframework.cloud</groupId>
        <artifactId>spring-cloud-starter-netflix-zuul</artifactId>
    </dependency>
</dependencies>
服务提供者的配置(application.properties)比较简单:
# 服务端口号
server.port=82
# 应用名称(serviceID)
spring.application.name=eureka_api_demo
# eureka服务发现配置地址
eureka.client.serviceUrl.defaultZone=http://localhost:1111/eureka/
启动类如下,比较关键的是注解@EnableDiscoveryClient:
package cn.lovecto.api.demo;

import org.springframework.boot.SpringApplication;
import org.springframework.boot.autoconfigure.EnableAutoConfiguration;
import org.springframework.cloud.client.discovery.EnableDiscoveryClient;
import org.springframework.context.annotation.ComponentScan;

@EnableDiscoveryClient
@EnableAutoConfiguration
@ComponentScan(value = { "cn.lovecto.api.demo" })
public class Application {

    public static void main(String[] args) {
        SpringApplication.run(Application.class, args);
    }
}
我们写一个TestController来处理http请求,一个请求获取session,一个请求获取cookie:
package cn.lovecto.api.demo.controller;

import java.io.Serializable;
import java.util.HashMap;
import java.util.Map;

import javax.servlet.http.Cookie;
import javax.servlet.http.HttpServletRequest;

import org.springframework.web.bind.annotation.RequestMapping;
import org.springframework.web.bind.annotation.RequestMethod;
import org.springframework.web.bind.annotation.RestController;

@RestController
@RequestMapping(value = "/test")
public class TestController {

    @RequestMapping(value = "/sessions", method = RequestMethod.GET)
    public Object sessions(HttpServletRequest request){
        Map<String, Object> map = new HashMap<>();
        map.put("sessionId", request.getSession().getId());
        map.put("message", request.getSession().getAttribute("map"));
        return map;
    }

    @RequestMapping(value = "/cookies", method = RequestMethod.GET)
    public Object cookies(HttpServletRequest request){
        ItripResult<Cookie[]> result = new ItripResult<Cookie[]>(1, "SUCCESS", request.getCookies());
        return result;
    }

    public static class ItripResult<T> implements Serializable{

        private static final long serialVersionUID = 1L;
        /**自定义状态码*/
        private Integer code;
        /**状态码对应的提示信息*/
        private String message;
        /**返回体*/
        private T body;

        public ItripResult() {
        }

        public ItripResult(Integer code, String message){
            this.code = code;
            this.message = message;
        }

        public ItripResult(Integer code, String message, T body){
            this.code = code;
            this.message = message;
            this.body = body;
        }

        public Integer getCode() {
            return code;
        }

        public void setCode(Integer code) {
            this.code = code;
        }

        public String getMessage() {
            return message;
        }

        public void setMessage(String message) {
            this.message = message;
        }

        public T getBody() {
            return body;
        }

        public void setBody(T body) {
            this.body = body;
        }

    }
}
eureka网关
eureka网关负责接收用户的http请求,再根据zuul的路由规则把请求转发给对应的服务提供方处理后并把处理结果返回给用户。
eureka网关的依赖(pom.xml)如下:
<dependencyManagement>
    <dependencies>
        <dependency>
            <groupId>org.springframework.cloud</groupId>
            <artifactId>spring-cloud-dependencies</artifactId>
            <version>Finchley.RELEASE</version>
            <type>pom</type>
            <scope>import</scope>
        </dependency>
    </dependencies>
</dependencyManagement>

<dependencies>
    <!--提供springMvc支持 -->
    <dependency>
        <groupId>org.springframework.boot</groupId>
        <artifactId>spring-boot-starter-web</artifactId>
    </dependency>
    <dependency>
        <groupId>org.springframework.boot</groupId>
        <artifactId>spring-boot-starter-test</artifactId>
        <scope>test</scope>
    </dependency>
    <!--eureka -->
    <dependency>
        <groupId>org.springframework.cloud</groupId>
        <artifactId>spring-cloud-starter-netflix-eureka-server</artifactId>
    </dependency>
    <!-- zuul -->
    <dependency>
        <groupId>org.springframework.cloud</groupId>
        <artifactId>spring-cloud-starter-netflix-zuul</artifactId>
    </dependency>
</dependencies>
eureka网关的配置文件(application.properties)如下:其中eureka开头的是注册中心的配置,这里“eureka.client.fetchRegistry=true”是必须的,只有这样才能发现其他服务;zuul开头的是网关路由的配置,一种是基于url直接转发(这里以转发到百度为例),一种是以serviceID的方式(这里会转发到我们上面的eureka服务提供方,serviceId就是上面的应用的名称eureka_api_demo).
# 服务端口号
server.port=80
# 应用名称(serviceId)
spring.application.name=eureka_gateway_demo
# 注册自身到eureka服务器
eureka.client.registerWithEureka=true
# 表示是否从eureka服务器获取注册信息
eureka.client.fetchRegistry=true
# eureka服务发现配置地址
eureka.client.serviceUrl.defaultZone=http://localhost:1111/eureka/
# ip地址作为前缀
eureka.instance.preferIpAddress=true

# zuul路由 配置使用具体地址绑定
zuul.routes.baidu.path=/baidu/**
zuul.routes.baidu.url=https://www.baidu.com
# zuul路由使用serviceId绑定
zuul.routes.testService.path=/apiTest/**
zuul.routes.testService.serviceId=eureka_api_demo
eureka的网关的启动类,这里比较重要的两个注解@EnableDiscoveryClient是启用服务发现,@EnableZuulProxy主要支持网关动态路由转发:
package cn.lovecto.gateway.demo;

import org.springframework.boot.SpringApplication;
import org.springframework.boot.autoconfigure.EnableAutoConfiguration;
import org.springframework.cloud.client.discovery.EnableDiscoveryClient;
import org.springframework.cloud.netflix.zuul.EnableZuulProxy;
import org.springframework.context.annotation.ComponentScan;

@EnableDiscoveryClient// 服务发现
@EnableZuulProxy// zuul网关路由分发
@EnableAutoConfiguration
@ComponentScan(value = { "cn.lovecto.gateway.demo" })
public class Application {

    public static void main(String[] args) {
        SpringApplication.run(Application.class, args);
    }
}
演示结果及小结
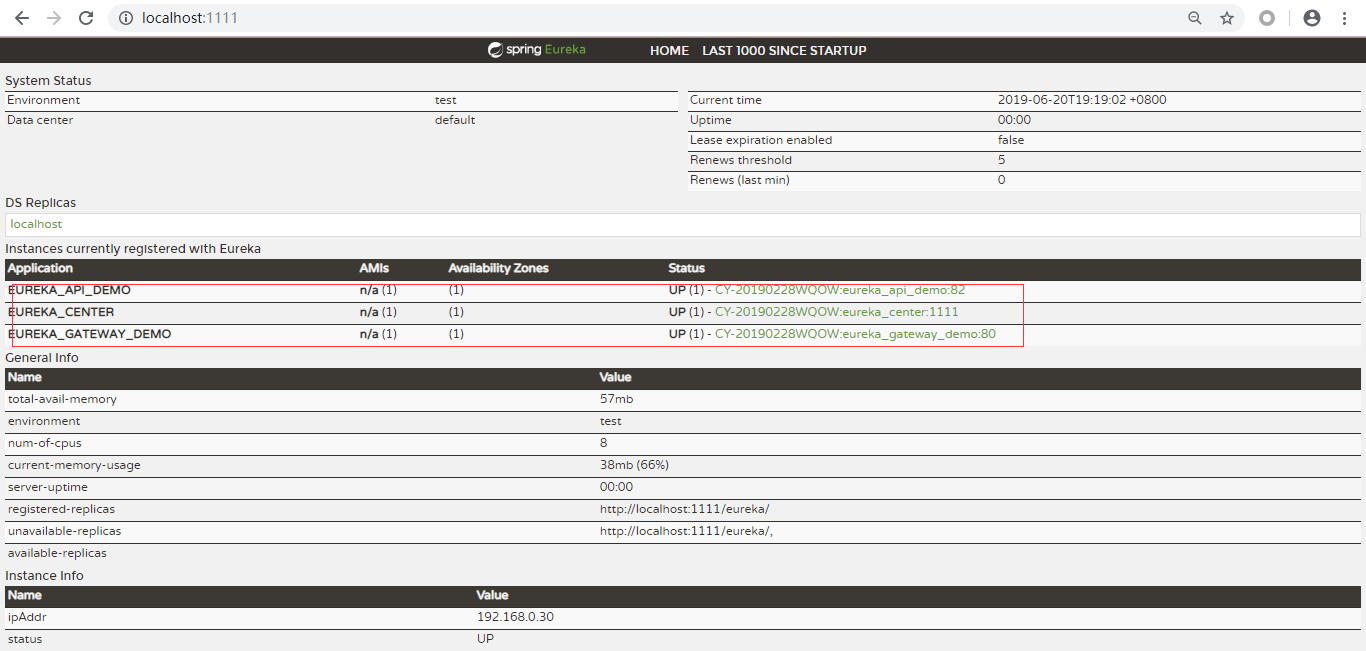
启动服务eureka_gateway_demo和eureka_api_demo后,再访问“http://localhost:1111/”,我们看到这两个服务都注册到了eureka中:

访问“http://localhost/apiTest/test/sessions”,如下:

访问“http://localhost/apiTest/test/cookies”,如下:

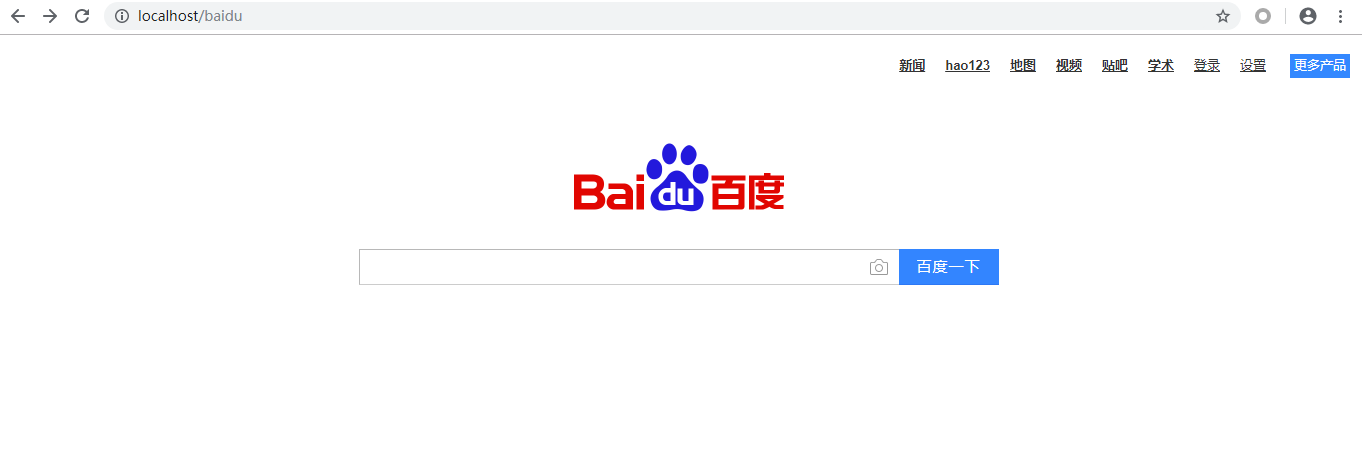
访问“http://localhost/baidu”跳转到百度,如下:

如上文描述,在springboot2.0.1.RELEASE结合springcloud使用eureka和zuul实现动态网关就是那么简单。动态网关在API网关开发中有很多重要的场景可使用。当然本文只是简单的一个demo,如果需要更详细的配置就自行研究springboot或springcloud中eureka和zuul部分的源码咯。
 LoveCTO

